
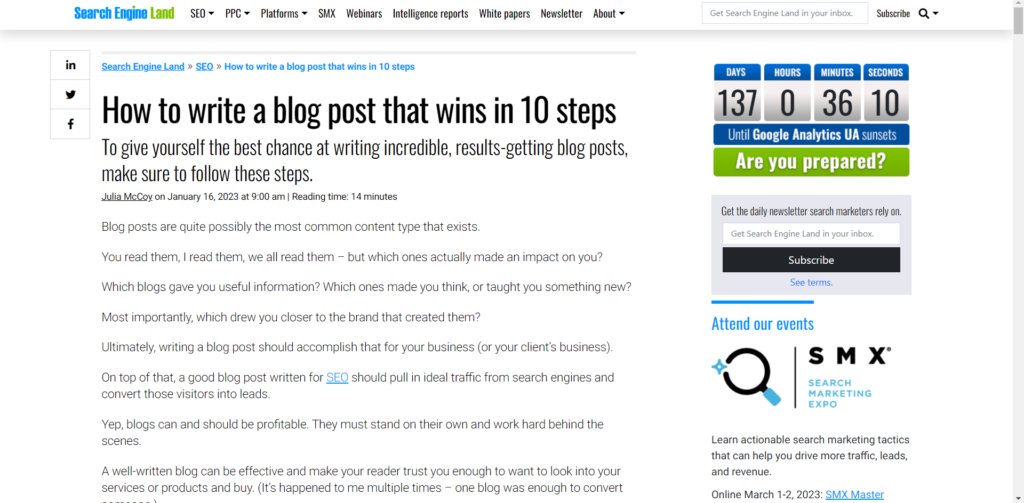
How to build an email list for your blog? [A COMPLETE Guide]

List building is quite tricky, without running a blog. Most businesses that are list building do it with a blog or opt-in system they built.
But, most opt-in systems work well because they run in conjunction with the blog posts they produce.
And don’t forget, building an email list is crucial for blog monetization to make big money. See our list of 9 blog monetization methods to understand how an email list is a MUST to implement many of those methods. Back to building an email list.

How to start an email list from scratch?
Think when you gave your email to websites. What made you do it? Think when you didn’t give your email?
And why. This will provide a rough idea of what can get a user’s email.
In this article, we’ll cover how you can conquer list building with your blog posts.
How to create a signup form in WordPress?
To create a signup form in WordPress, follow these 4 steps:
- Choose a list building service
- Install a WordPress plugin to collect emails
- Connect the list building service to the WP plugin
- Use the plugin to create the signup form
Choose a list building service
List building services are services that help build and manage email lists of your blog visitors. With a list building service, businesses can obtain customer information, specifically email addresses.
List building services combine automated or triggered email campaigns to send personalized messages or emails to the list.
Simply put, a list building service is a Content Management Service [CMS] that stores all the emails you collect into a list.
You can then create automated or triggered email campaigns to send personalized messages or emails to the list.
If list building services interest you, check out blog writing services as well as our PRE Purchase guide on blog writing services.
Each list building service differs in the following factors:
- Email list size: How many emails can you collect
- Monthly email send limit: How many total emails can you send in a month [For example, if you have an email to send to an email list of 10,000 but your limit is 2000, you can only send that email to 2000 emails from your list]
- Daily email send limit: How many total emails can you send in a day
- Pricing
- Email templates: The number of prebuilt email templates they provide
- Drag and drop functionality: The level of email customization they provide [This is mostly the same for most services]
List Building Services
Here are 2 list building services that are best suited for beginners starting with a small budget:
- SendInBlue
- MailJet
Getting tools to grow your blog fast? Check out our list of 78 blogging tools to discover tools and methods to boost blog growth that you’ve never thought of.
SendInBlue
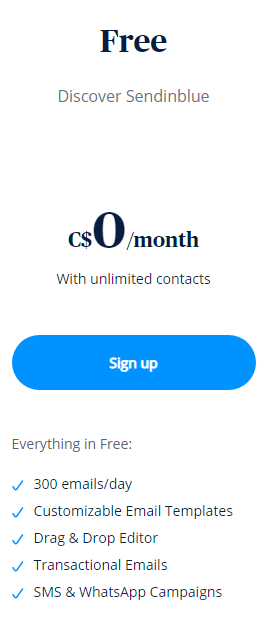
SendInBlue is a list building service providing the following for FREE:
- Unlimited contacts [Your list can have unlimited emails]
- Daily email send limit: 300 emails/day
- Monthly email send limit: 9000 emails/day
- Customizable Email Templates
- Drag & Drop Editor
- Transactional Emails
- SMS & WhatsApp Campaigns
Here’s a screenshot of their FREE plan [See all their plan features here]:
- Learn how to use SendInBlue from their tutorials
- See SendInBlue reviews to make an informed decision.
MailJet
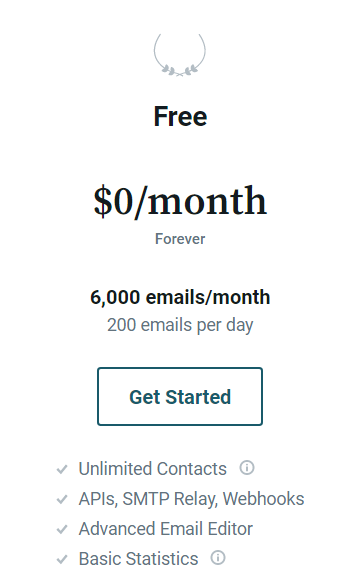
MailJet is another list building service providing the following for FREE:
- Unlimited Contacts [Your list can have unlimited emails]
- Daily email send limit: 200 emails/day
- Monthly email send limit: 6000 emails
- APIs, SMTP Relay, Webhooks
- Advanced Email Editor
Here’s a screenshot of their FREE plan [See all their plan features here]:
- Learn how to use MailJet from their guide
- See MailJet reviews to make an informed decision
Install a WordPress plugin to collect emails
You need a WordPress plugin that can create signup forms and banners which you can place on your blog. Users can then place their emails into these signup forms. This is known as obtaining a lead.
And that is considered collecting an email. Once you connect your WordPress plugin to your list building service [Explained later], the emails that are collected will then be automatically stored in the database of the list building service you chose.
See how to install a WordPress plugin from our guide on how to set up a blog
The BEST list building plugin
The best list building plugin is WPForms. WPForms is NOT FREE but has a FREE version, called WPForms Lite. You can start by using their Lite version and can upgrade later [Once you integrate it with your list building service].
But it’s worth it because of the countless features it provides. This plugin lets you build signup forms such as:
- Popups
- Header/ Footer ribbons
- Sidebar widgets
- Inside content banners
- 2-Step signup forms
- Slide Ins
- Screen fill overlay
- Content lock
- Scroll mats
- Multiple choice forms
You can make any type of form you want, all in a single plugin, with ease. Not to mention the prebuilt templates they provide. And it even allows you to make mobile friendly signup forms. Check out their pricing here.
- Learn how to use WPForms.
- See WPForms reviews to make an informed decision.
FREE Popup Builder Plugin
Hollerbox is a FREE popup builder plugin that lets you build simple straightforward popups. If you upgrade to a premium plan, it can provide you with all the features that WPForms offers.
Keep in mind, in the FREE plan, Hollerbox only offers option popups, not other types of lead generation forms that you could anywhere.
But, if you’re only looking to have popups, this is a great WordPress plugin [This is also why Hollerbox is ONE of the 12 Must Have plugins].
A FREE Alternative
A FREE alternative, if you don’t want to buy WPForms [You need to purchase one of their plans to be able to integrate it with list building services like SendInBlue], is to get the SendInBlue plugin which is FREE. And you can integrate it with your SendInBlue service for free as well. The only sacrifice to make is that you won’t get much customization with the forms [Unless you can work with code; You can always get coding help online]. But, if you want full customization, the best choice to make is WPForms.
Note: The same way SendInBlue has a plugin, other list building services [Like MailJet] also have their plugin counterparts that you can integrate your blog and list building service with for FREE. simply search the name of the service in the WordPress plugins.
Note: There are other
Connect the list building service with the WordPress plugin
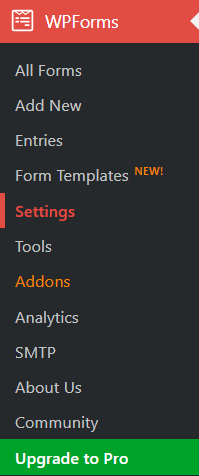
If you’re using WPForms, go to the WP dashboard > hover over WPForms in the left sidebar > Click on Settings
Select the list building service you’re working with and create an account for it [In the screenshot below, ConstantContact was selected]

Check out this guide to learn how to integrate SendInBlue [The list building service] into WPForms.
If you’re using SendInBlue as you’re list building service [Or any other service except ConstantContact], you will require to upgrade your WPForms plan to be able to integrate with it.
Use the plugin to create the signup form
The next step is to create the signup form and place it on your blog. The process is pretty simple and may slightly differ from plugin to plugin.
Here is a step by step process on How to use a plugin to create a signup form on WordPress
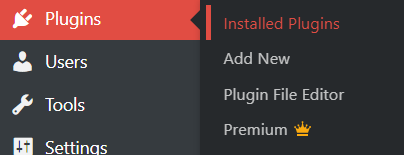
- Go to WordPress > Plugins
Log into your WordPress dashboard and navigate to the “Plugins” page.

- Install & Activate WPForms
On the “Plugins” page, use the search bar to search for WPForms and install the plugin.

Activate WPActivate the WPForms plugin and then navigate to the “WPForms” page on the left column of the WordPress dashboard.
- Start creating your signup form
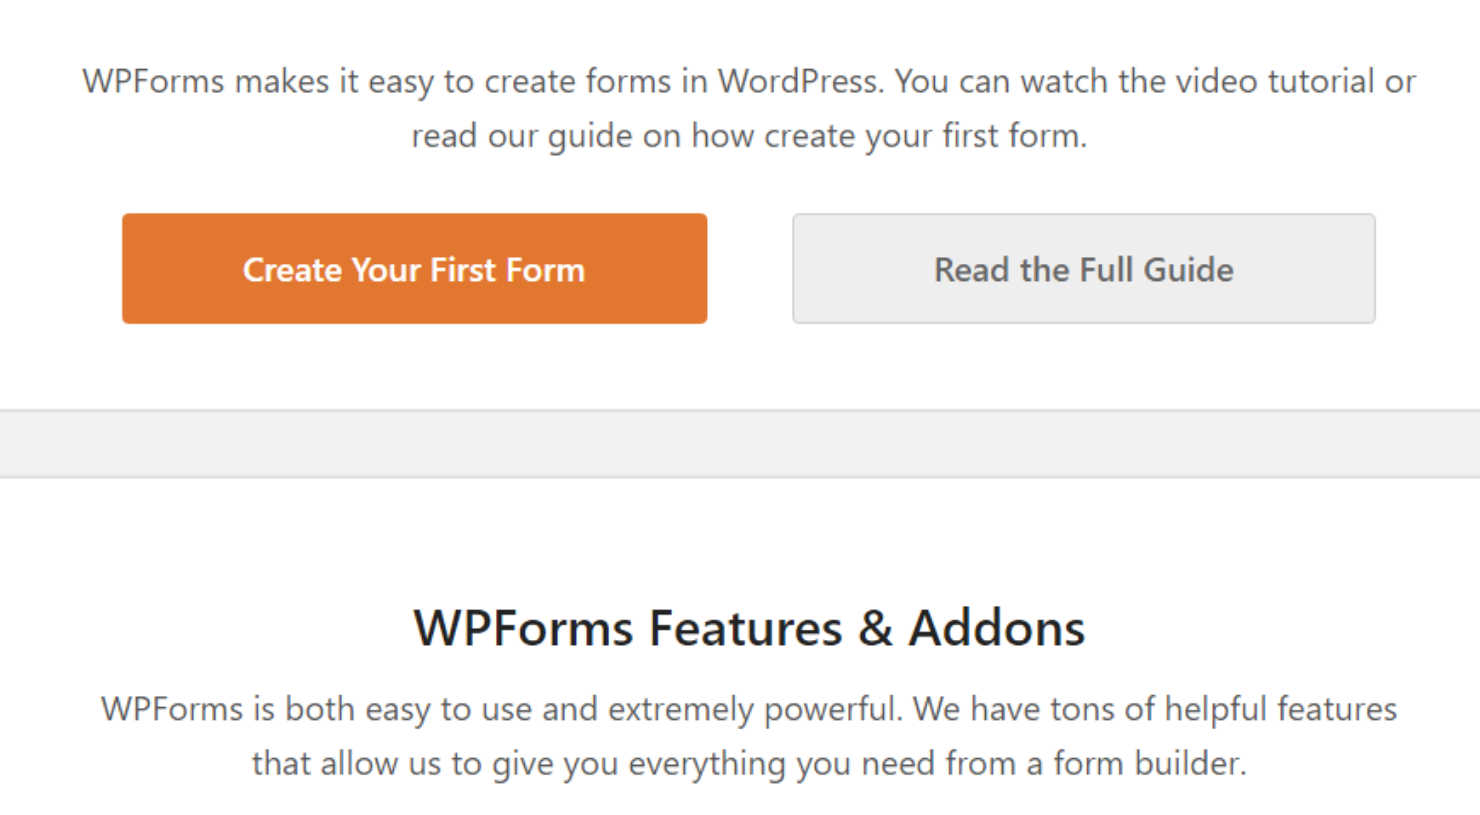
On the “WPForms” page, click the “Create Your First Form” button to create a new form.

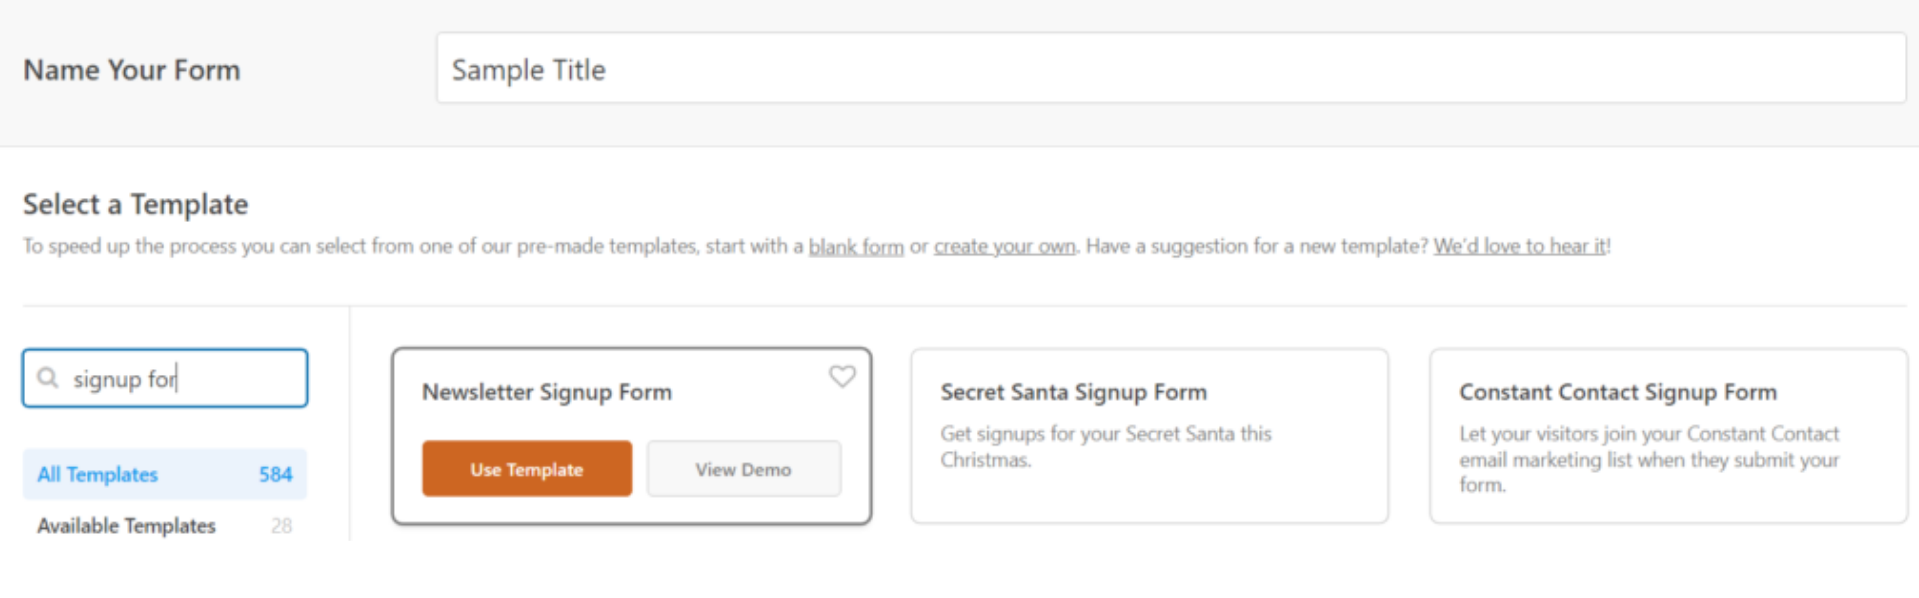
- Choose a form template
On the next page, enter the title of your form and select the “Signup Form” template.

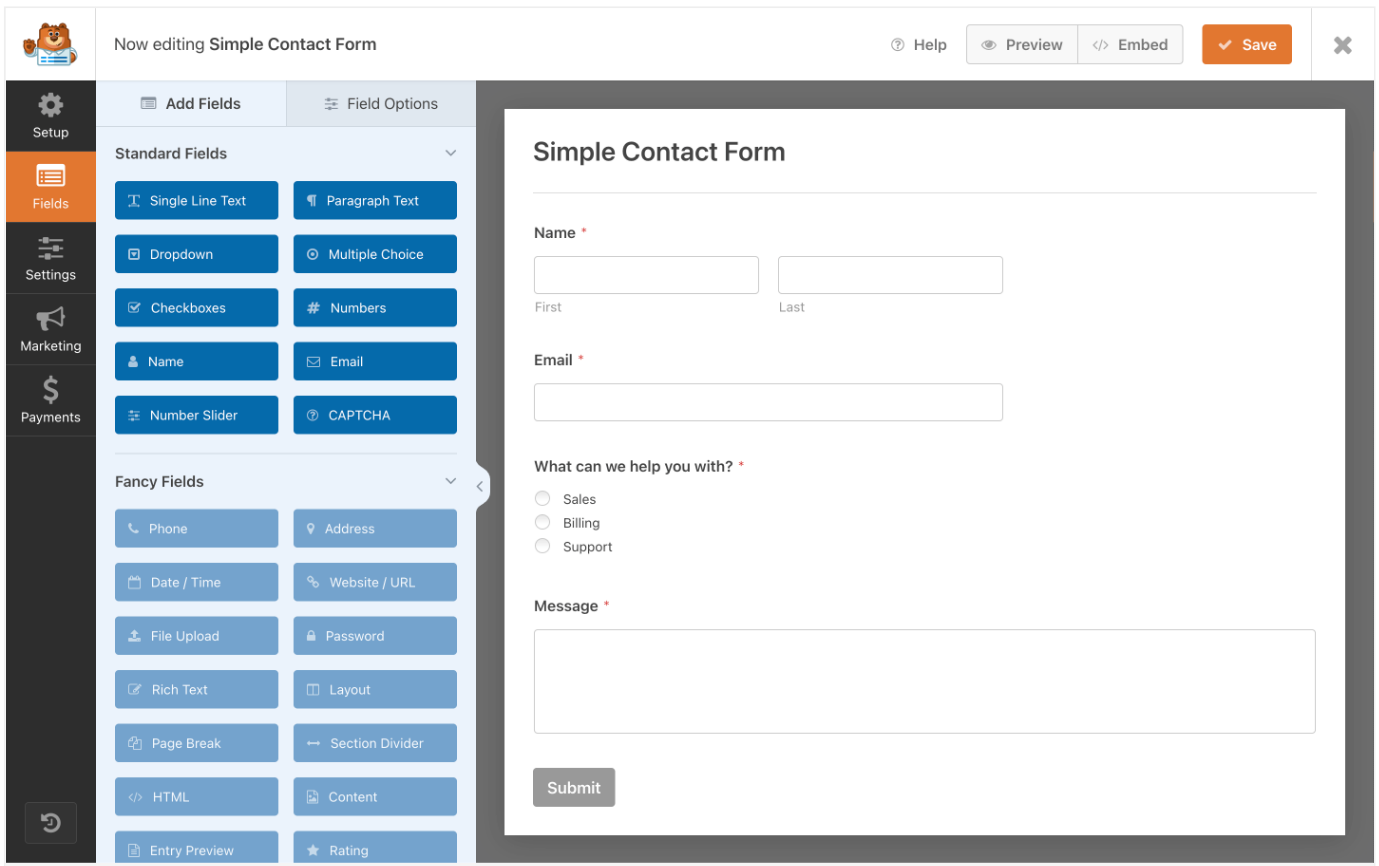
- Customize the signup form
Use the drag and drop interface to add the fields and settings you want for your signup form.

When you are done, click the “Save” button on the top right corner of the page. - Ready your signup form to use on your blog
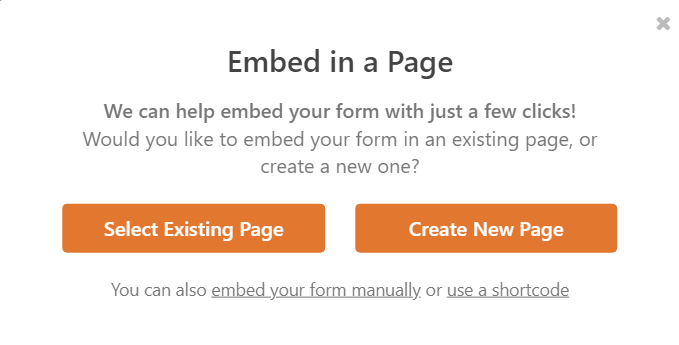
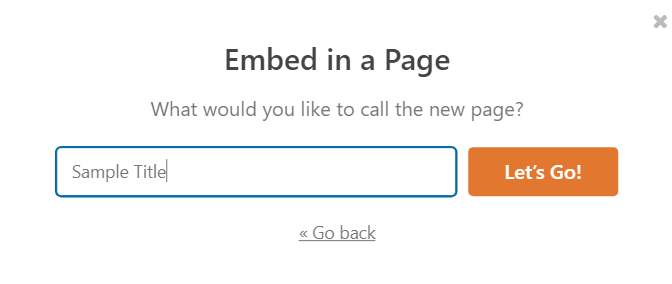
Click the “Embed” button for the form you created [This will display the popup below], and select either an existing or new page

[You can also embed your form manually or use a shortcode using the links provided in the popup]
[If you select “Create New Page”], enter the title of your new page
And it will create a new page with the form you built displayed on it. You can even select the form and place it in your widgets anywhere [Within your content, header, footer, sidebar, etc]. - Add your signup form wherever you want on your blog
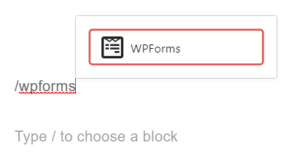
Go to wherever you want to display the signup form, and type “/WPForms”

Click on the WPForms option. You can then select whichever form you want to display from the dropdown:
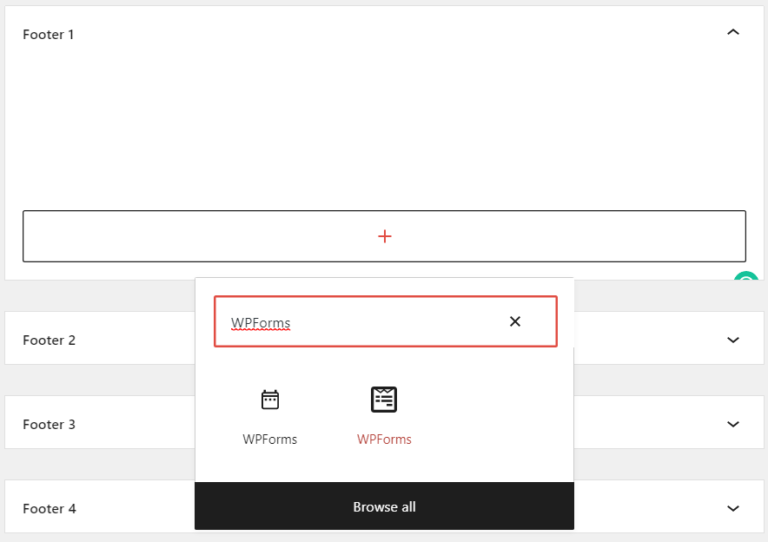
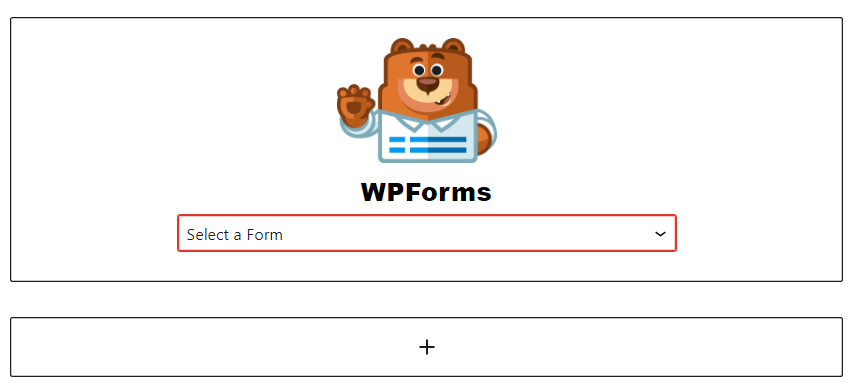
OR if you’re in the widgets section [Or header/ footer], simply click on the “+” [The Add button], search for WPForms, and select it:
And then choose the desired form from the dropdown:
Note: This is done in the Kadence theme. Adding elements and widgets to your blog and content [This step] may have a slightly different process in other themes


These steps will differ from plugin to plugin [And then to theme], but the general process will remain the same.
FAQ
To create a user registration form in WordPress:
Go to the WP dashboard > WPForms [Click on the WPForms tab in the left sidebar] > Add New >
Select a template [For user registration, you’re looking for their email, so just select the signup template] >
Customize it > And then embed it on your blog
To add a MailChimp signup form in WordPress:
Go to the WP dashboard > MailChimp [Click on the MailChimp tab in the left sidebar] > Add New >
Select the signup template > Customize it > And then embed it on your blog.
This process is the same regardless of what plugin or list building service you use [With minor differences]
How to write a Call to Action for list building
The average click through rate [CTR] for calls to action is 4.23%. That’s a higher CTR than that of Google Ads. Here we provide you with tips on how to write a call to action as well examples we gathered from blogs.
Tips on how to write a call to action
Here are 5 tips on how to write a call to action for list building:
- Make it evident and obvious what you’ll provide them
- Keep it short
- Make it visually appealing
- It should stand out a little bit
- Display the signup bar
Make it obvious what they’ll get
Once you know what to provide, tell them that clearly and concisely. For example, If you plan to provide them with a FREE EBook, tell them that in your Call to Action.
Remember, if it’s unclear what value they’ll get, they won’t feel the urge to give their email.
Bonus: Provide them with a source of immediate value. This would include FREE resources like EBooks, infographics, checklists, etc.
When it’s immediate, readers have an impulsive urge to provide their email compared to if they’re just signing up for your newsletter.
Keep it short
Keep the call to action short. Don’t have a paragraph, because no one’s reading it. You can have a good amount of copy, as long as it’s concise and, if possible, in the form of a list. If it’s a few words, it catches the eyes far quicker.
Make it visually addicting
Have some sort of a visual background or graphic to make the users look at the CTA for a longer period of time [More time they look at it, the higher the chance of them converting].
Not to mention that a visual helps in catching more attention. Understand more about visuals from our visual design guide.
It should stand out
The call to action should stand out from the rest of your blog. Because you want readers to notice it, and give their email. It shouldn’t just blend in. Here are 5 elements to make the call to action stand out:
- Colour: Play with colours. Try using colours that contrast the colours of your content. If your content is black and white, almost any colour will stand out. Do stick to your brand colours in general [You can play around with the shades and tones of your brand colours, but keep the same colour].
- Different buttons: Sometimes, just changing the signup button can make an impact on how attractive the call to action becomes. Play with the shape, colour, border, shadows, and text of the button.
- Have readable text: The text should be readable. It should be big and bold. If you want to see how to use text to stand out, just go on Pinterest and take a look at pins. Pinterest pins display firsthand how well text can be used to stand out.
- Use graphics and visuals: A good old graphic is more than enough to catch the eyes when they’re reading through blocks of text on your blog.
- Have white space: The call to action can even stand out by having white space. It’s not all about stuffing the call to action with elements. Oftentimes, people are equally distracted by calls to action that are overstuffed with elements, as well as by those that are mostly filled with white space. Test them both out!
Display the signup bar
Many times, readers don’t realize that you’re asking them for their email when you display call to action banners where you only show what you’ll provide.
Because they may just think it’s an Ad or visual, and won’t ever click on it. Simply adding the signup bar makes it obvious to them and can very much increase your lead generation.
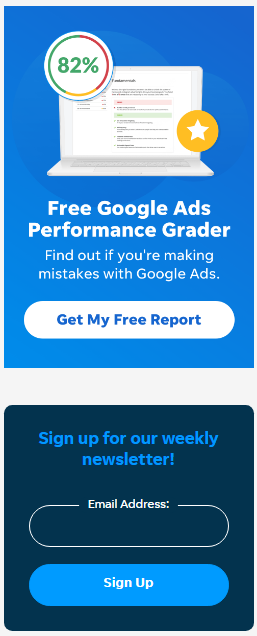
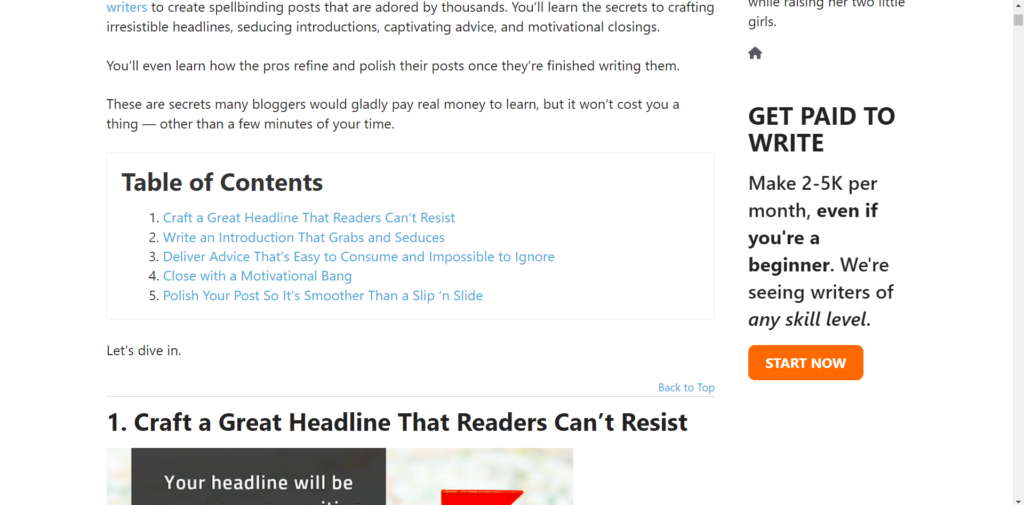
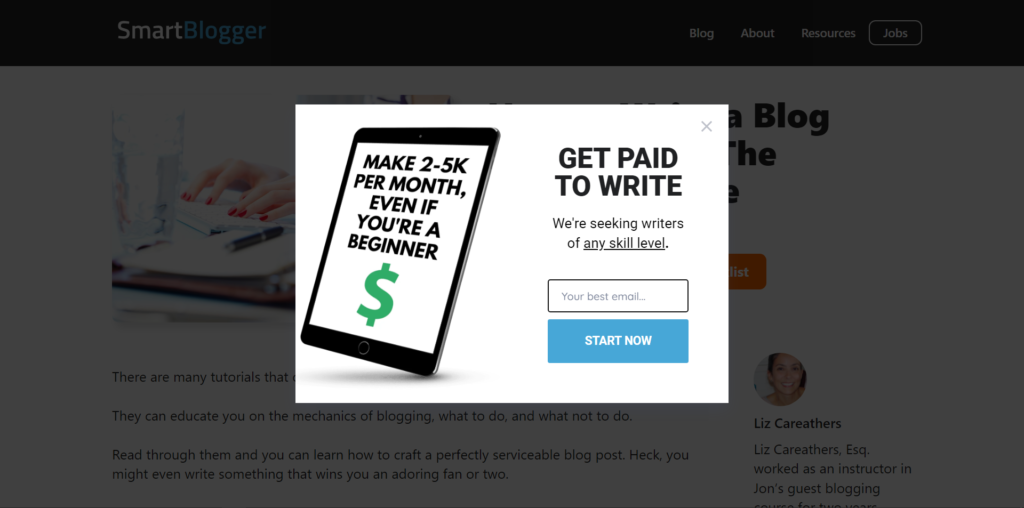
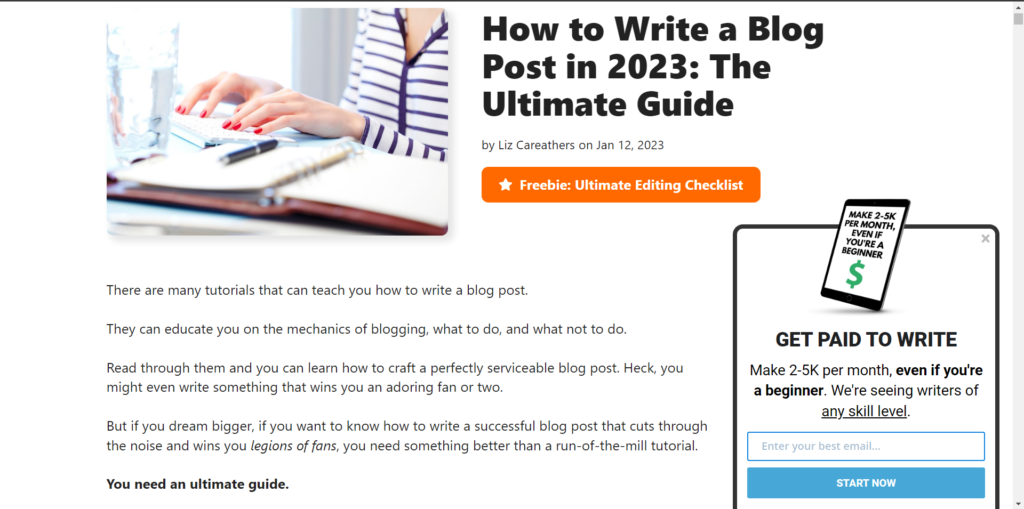
21 Email Call To Action examples
Here are 21 email call to action examples that follow the simple concept of providing value in return for an email. Use these examples as inspiration to build your own email call to action.
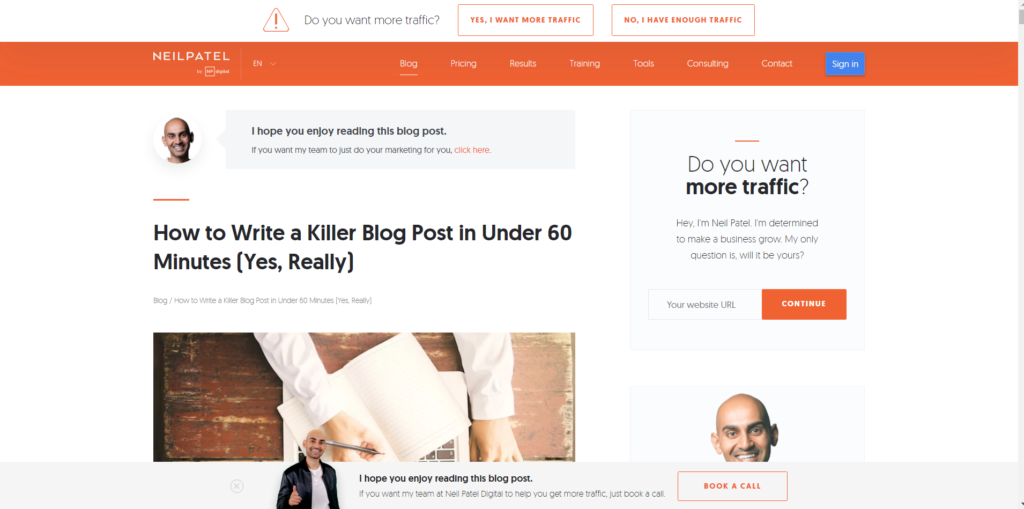
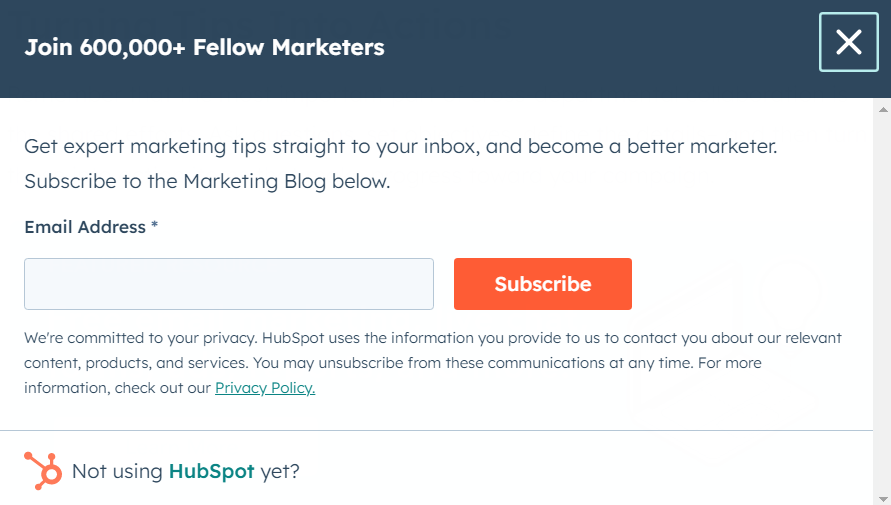
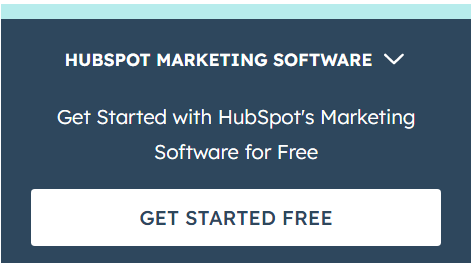
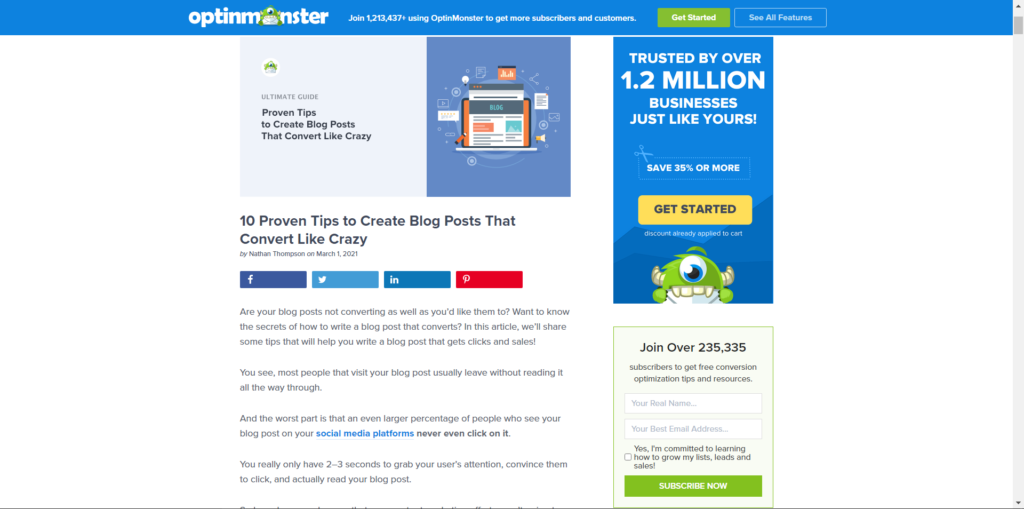
We will show you close ups of the call to action and then a bird’s eye view so you can see where and how it is displayed on the blog:
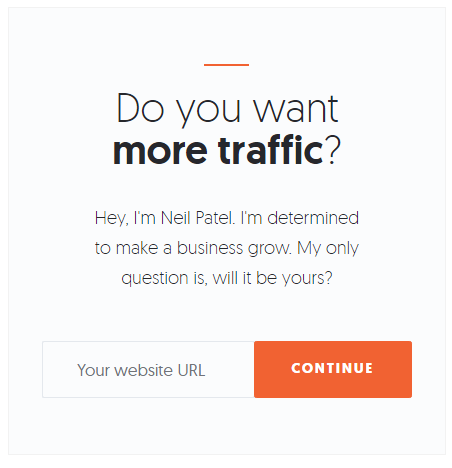
1: Neil Patel

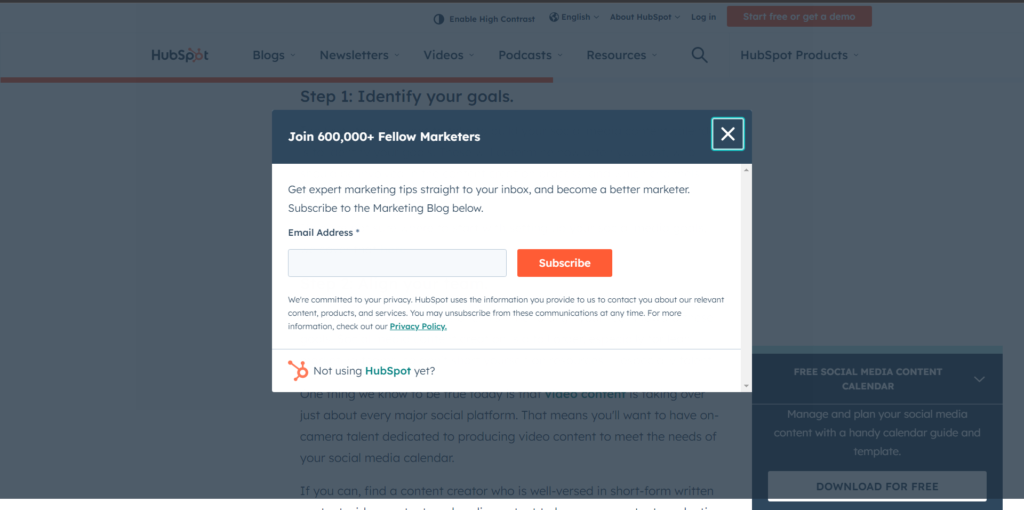
2: Hubspot

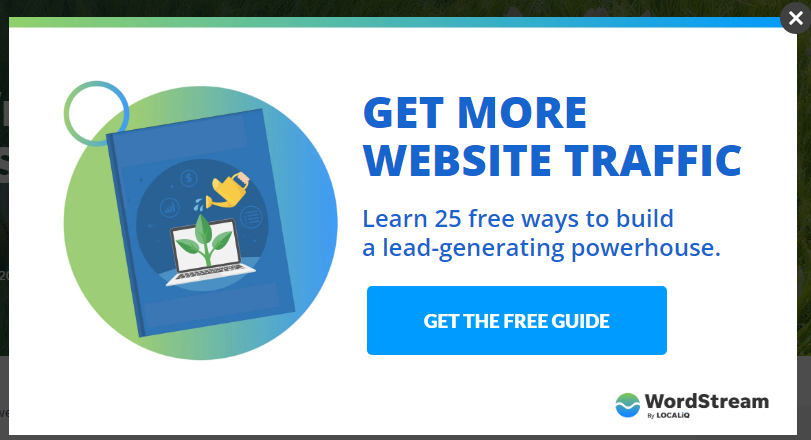
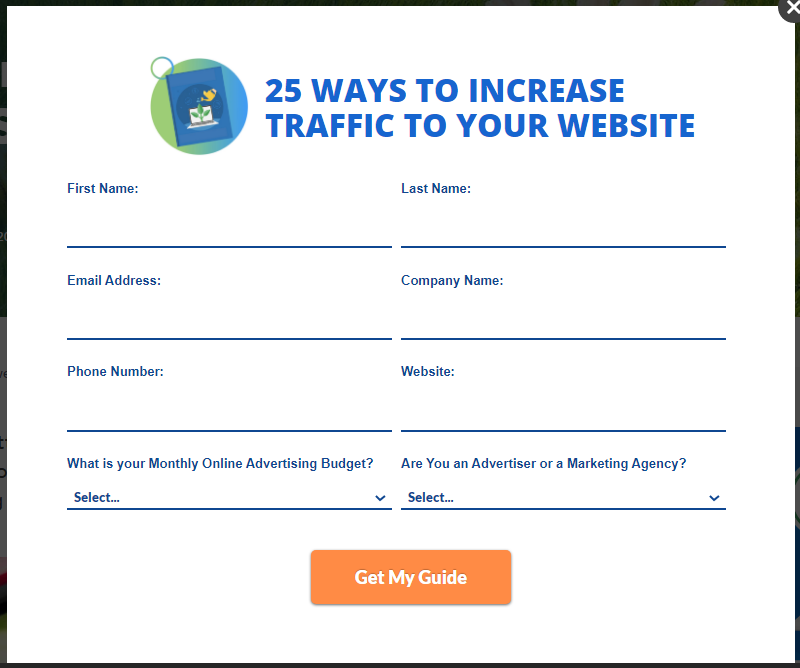
3: WordStream

4: MasterClass

5: SmartBlogger


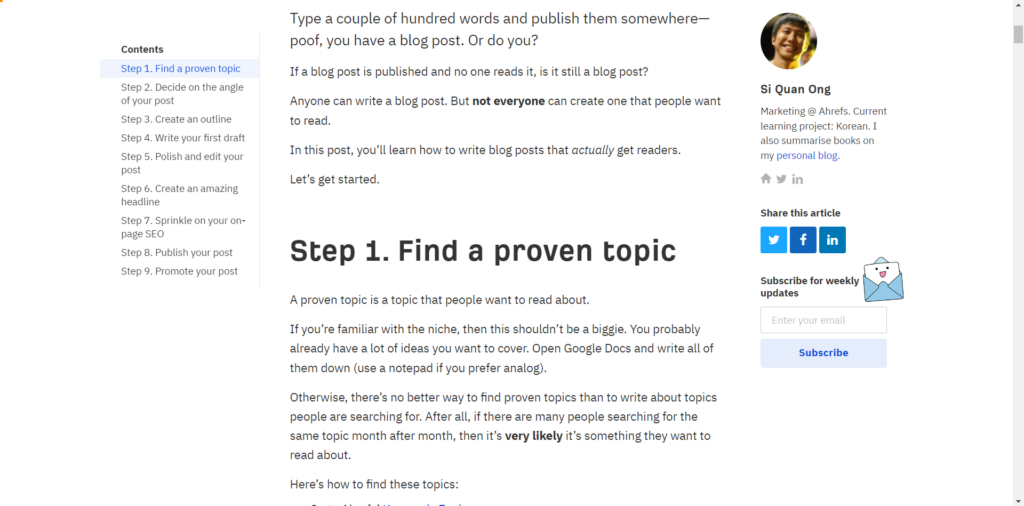
6: Ahrefs


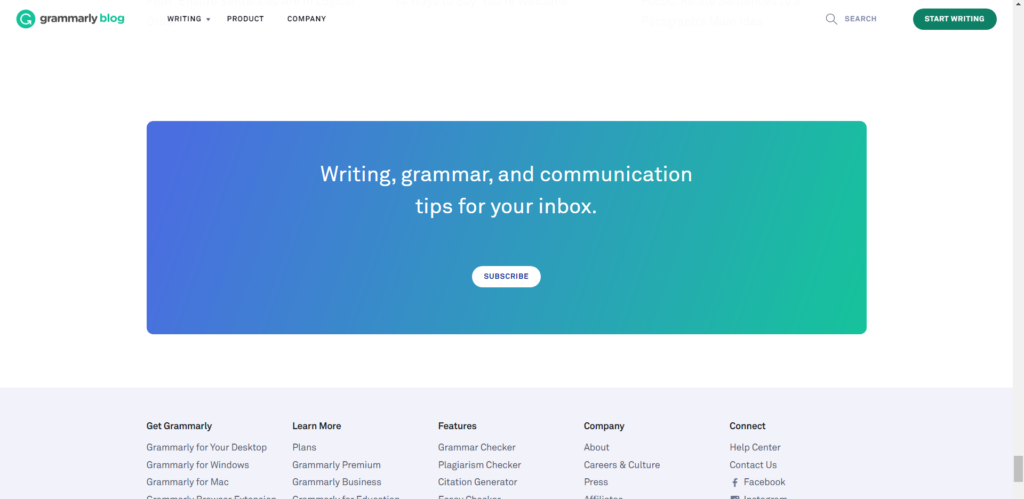
7: Grammarly

8: Hostinger


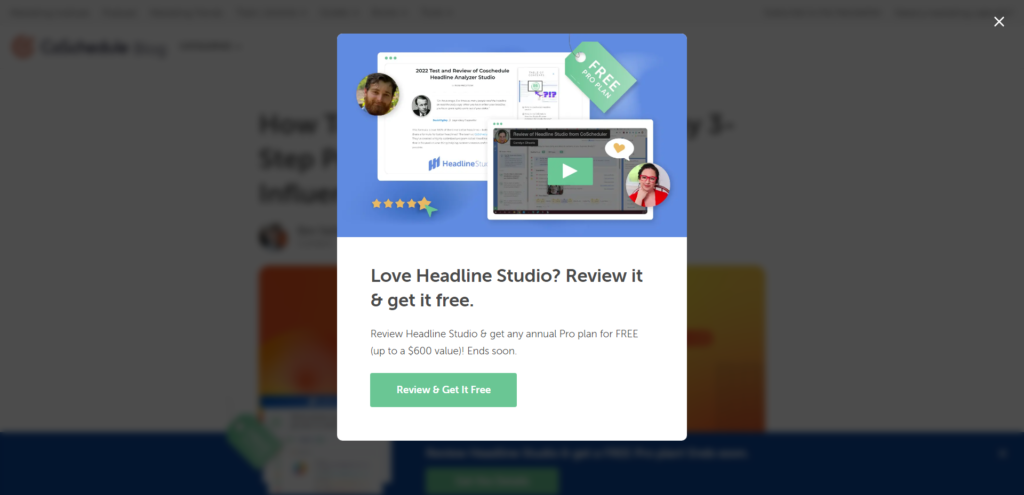
9: Coschedule


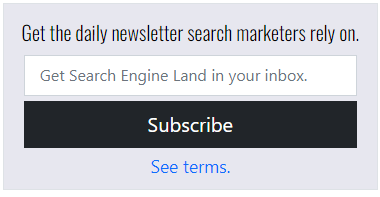
10: SEOJournal
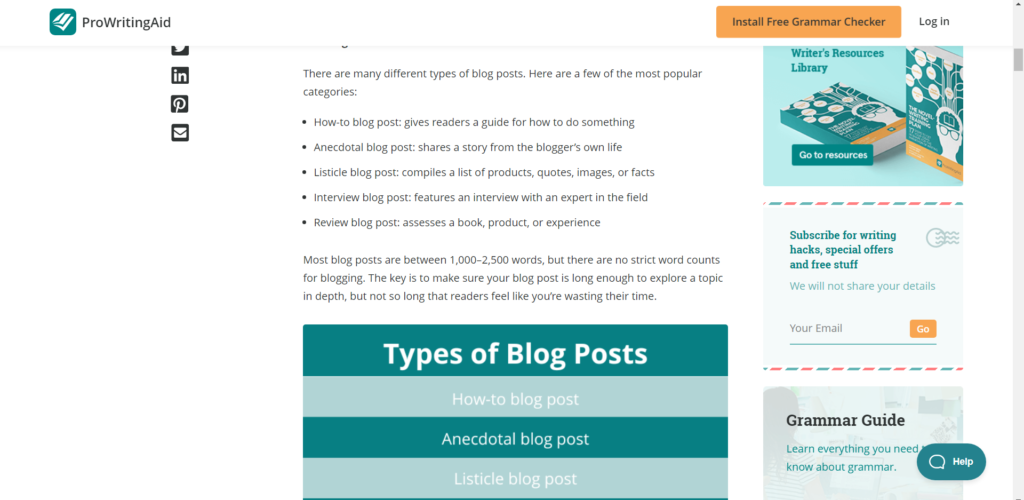
11: ProWritingAid

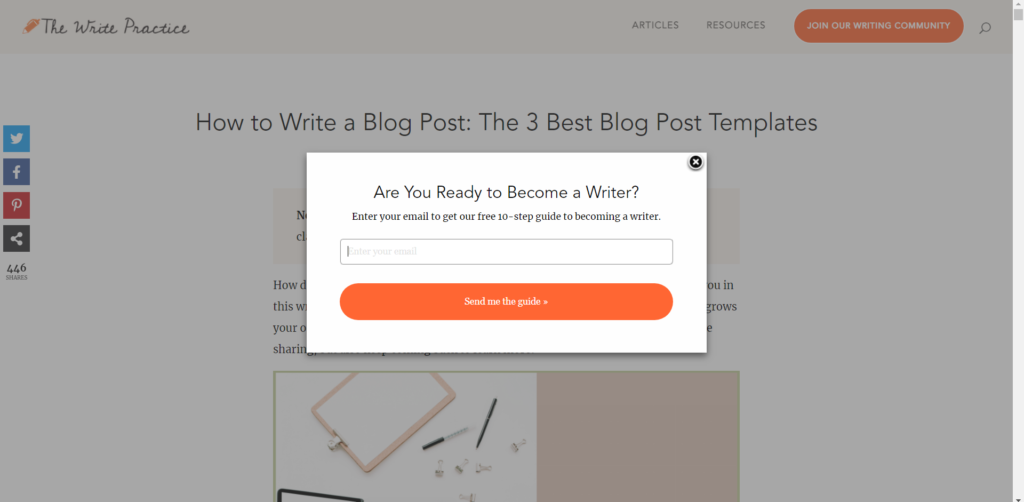
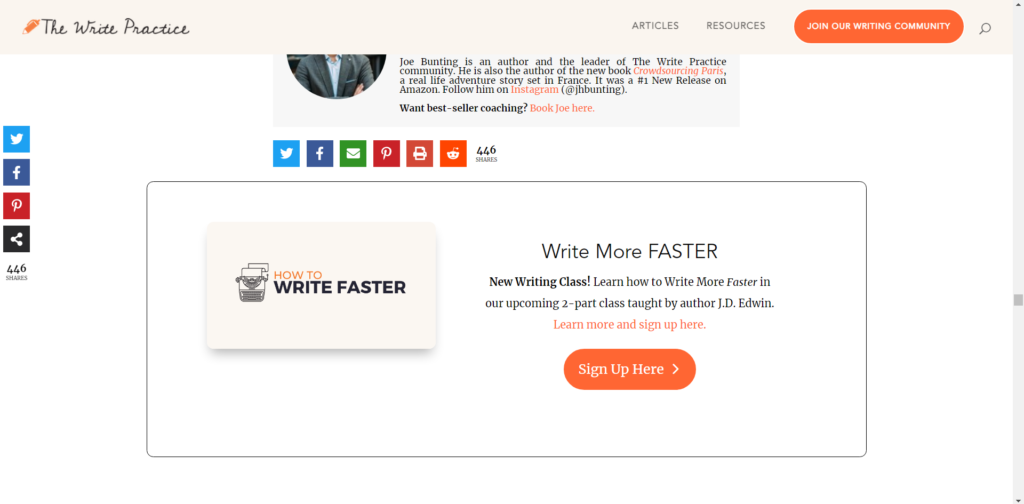
12: TheWritePractice
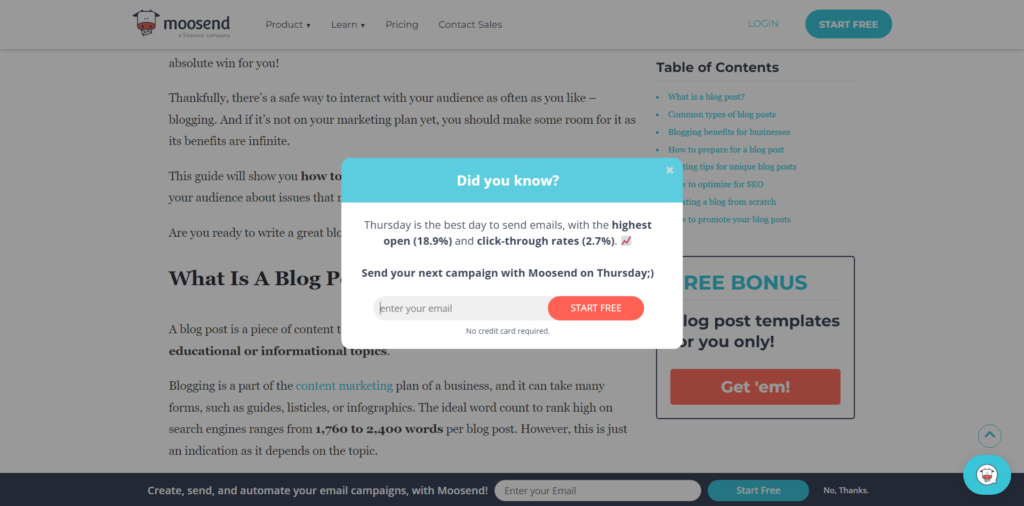
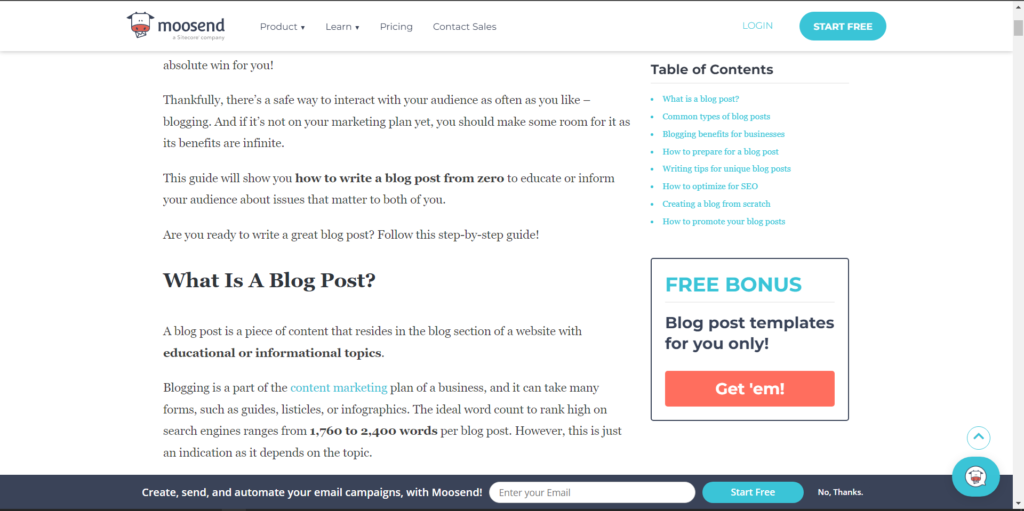
13: MooseEnd


14: BloggingTips

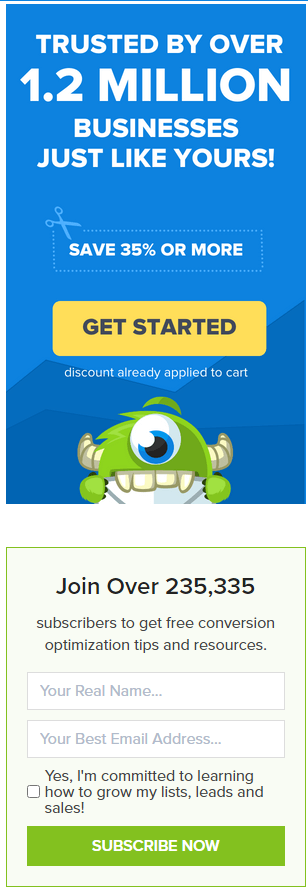
15: OptinMonster

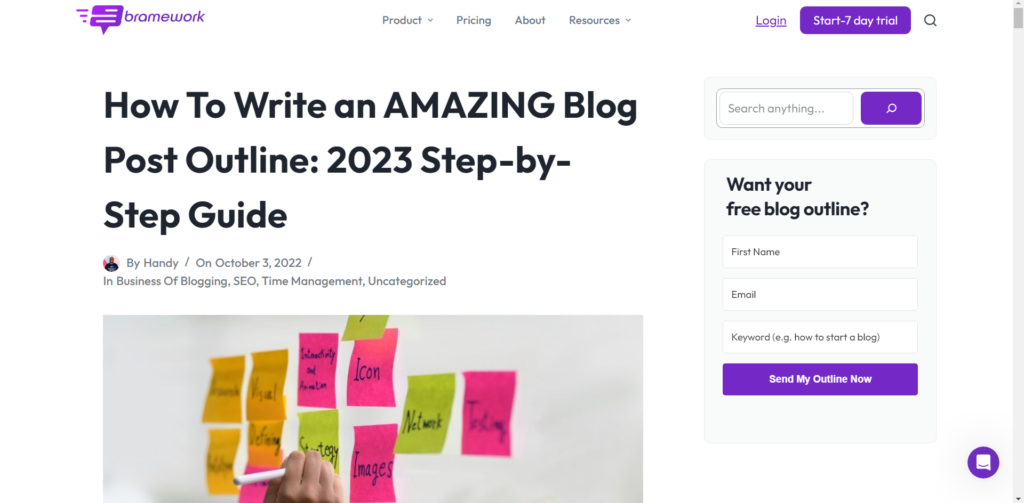
16: Bramework

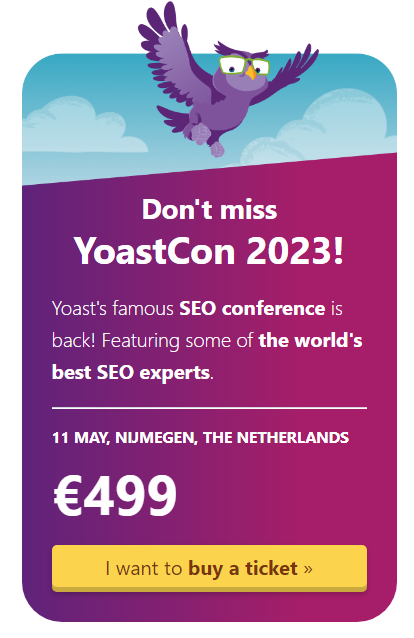
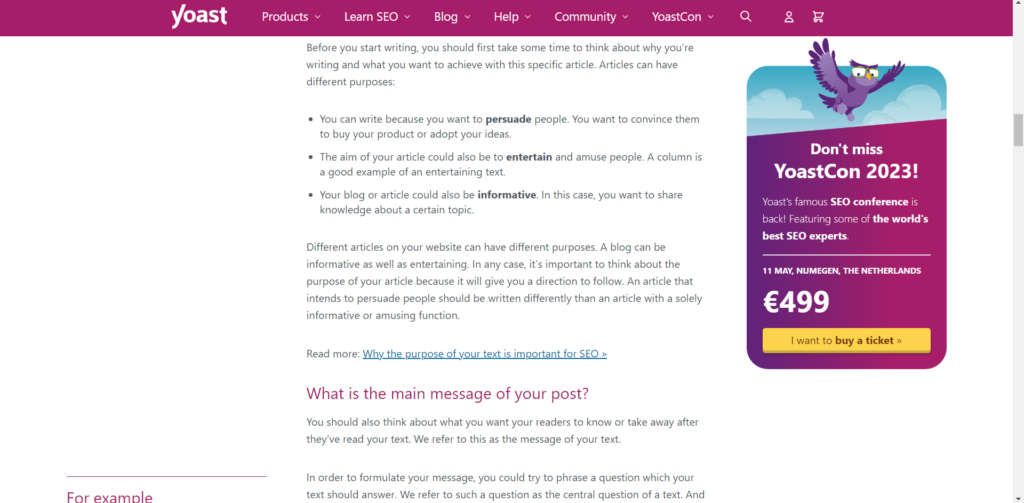
17: Yoast
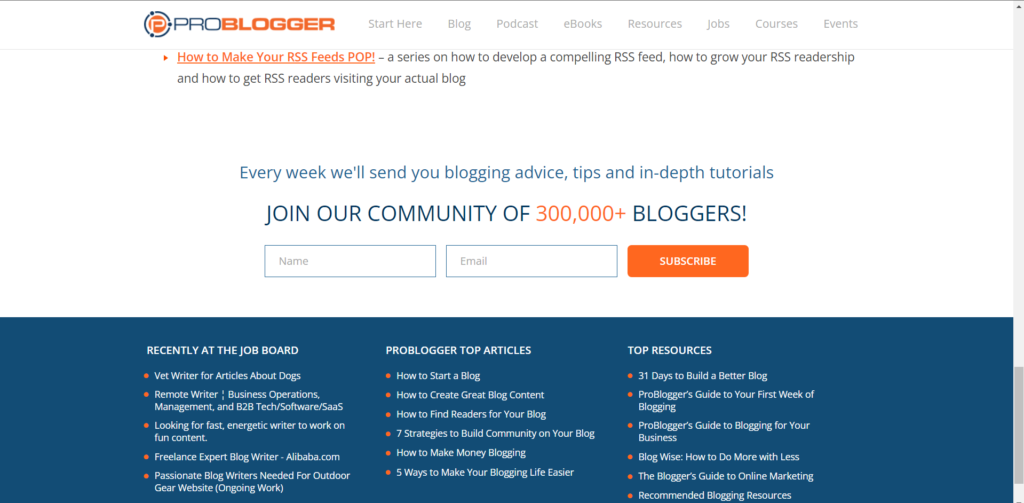
18: ProBlogger

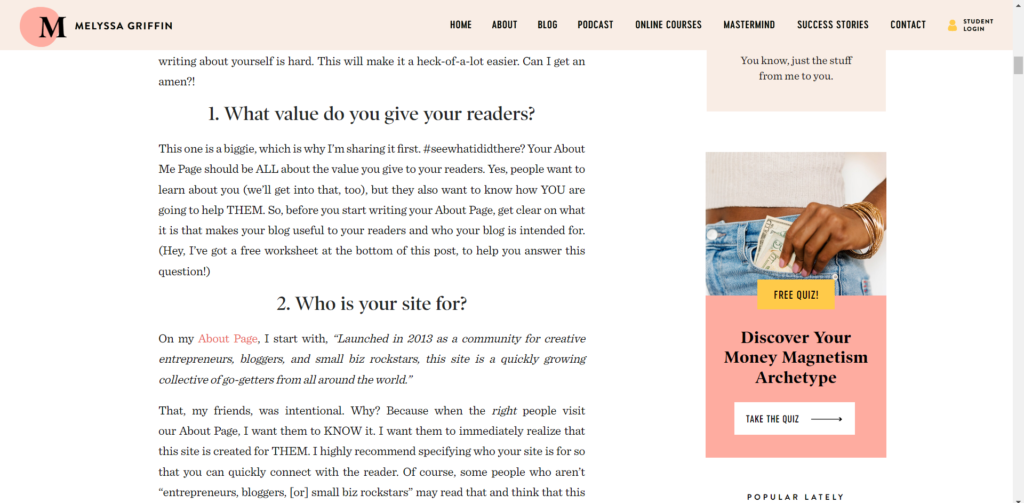
19: MelyssaGriffin

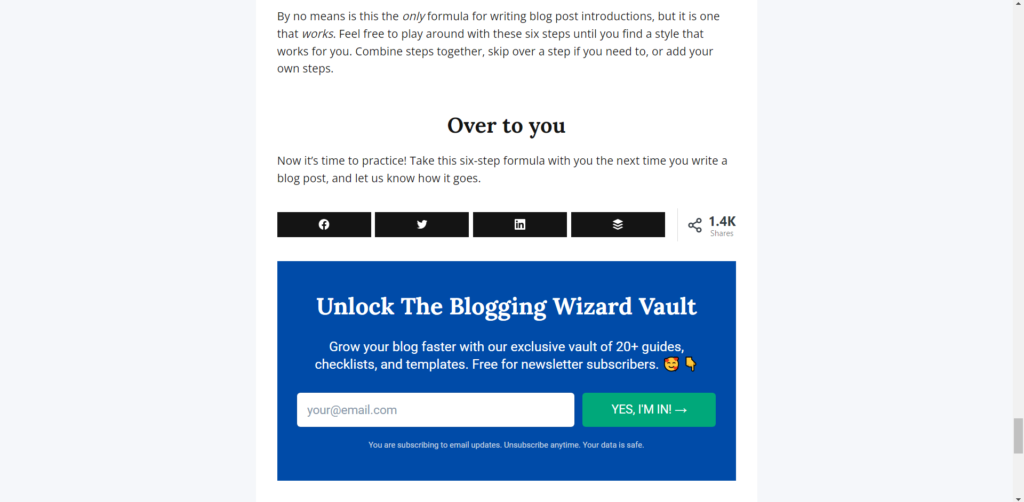
20: BloggingWizard
21: Simplified
7 List building techniques
These are 7 list building techniques that you can use to increase the size of your email list:
- Incentivize on social media: Get people from your social media accounts to sign up for your email list by providing lead magnets [Similar to the ones you plan to provide on your blog]. This is a great method to repurpose your lead magnets. Learn more about how to repurpose blog post content.
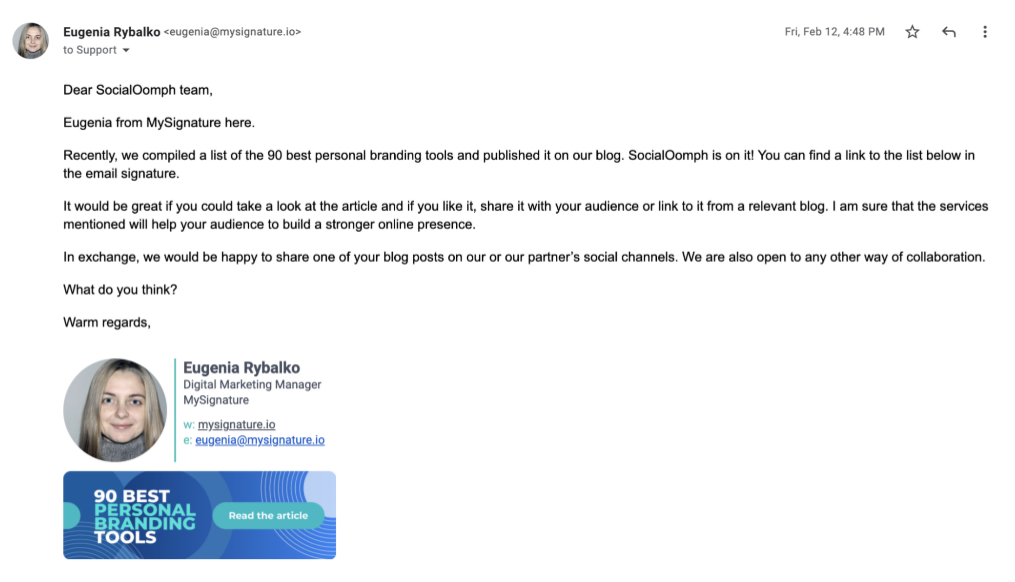
- Add a lead magnet to your Email signature: This is an easy method to get potential leads. Simply add a call to action in your email signature [Like the example below]. So whenever, you send an email to anyone, they can potentially click on your link and sign up.
- Display your signup form in ALL the following sections of your blog
- Sidebar [Further reinforced in our blog sidebar design guide]
- Header [An important concept explained more in our header design guide]
- Footer [A great way to use the footer discussed in our guide to footer design]
- Above the blog post
- Below is the blog post
- Within the blog post
- Have a list building Exit intent popup [Use an exit intent popup form available in WPForms and Hollerbox]: Having an exit intent popup can get you leads that you would’ve otherwise missed out on. Oftentimes, readers come onto your blog, but may not see your call to action or don’t give it too much attention. Displaying a popup right as they’re about to leave disrupts them. They’ll definitely see it now and potentially convert.
- Have a list building landing page: Landing pages convert far better because you have a lot more space to provide content that can convert readers. Having a landing page is suitable when you’re providing resources that may be difficult to explain and display in a small confined area like a banner.
- A/B split test with different types of lead magnets: Different lead magnets work better in different scenarios. And how well they work change from blog to blog, niche to niche, page to page. So test them all out and see what works best for you.
- Also, you should A/B split test with the lead magnet copy
- Also, you should A/B split test with the lead magnet visuals
- Investigate your blog competitor’s list building techniques [Learn more from our guide on blog competitor analysis]
- Go through their blog posts, and click wherever you can. Until, you are asked to provide your contact info, specifically your email.
- If it’s asking for your email, it means it’s a lead magnet. Take notes on the following questions:
- Where did you find the lead magnet on their site
- What pages? Was it on every blog post?
- Was there a CTA in their header for it?
- How often was the lead magnet displayed on a single page
- Where on the screen was it displayed?
- What type of lead magnet/ CTA was it? [lead magnet/ CTA types discussed later]
- What was included in the lead magnet/ CTA?
- Visually
- Text copy
- Length of the message
- [Sign up to see what you get in your email] What was in the email sent to you after signing up
- Visually
- Text copy
- Links
21 Email Lead magnets
Email lead magnets are resources that you provide in return for an email. They are built to be attractive offers that work great at getting emails. Lead magnets are also known as gated content.
What is gated content?
Gated content is available only to users who sign up for an email list. It can be used to entice potential customers to join the list by offering exclusive deals or competitions.
Many blogs use gated content to incentivize users to sign up/ subscribe, and therefore makes it a reliable method to build an email list of people who can be monetized.
Here is a list of 21 email lead magnets:
- White papers
- Research reports
- How-to guides/ Tutorials
- EBooks
- Case studies
- Educational courses
- Webinars/ Interviews
- Podcasts & virtual event
- Product demos
- Subscription-only newsletters
- Checklists & cheat sheets
- Membership sites & surveys
- Resource lists
- Videos/ Scripts
- Templates
- Workbooks
- ECourses
- Swipe files
- Toolkits
- Planners
- Calendars
Bonus: Stick to short form content. Becuase 58.6% of marketers obtained higher conversion rates with short-form written content – like newsletters, checklists, or ebook samples.
FAQ
Here are frequently asked questions you’ll find informative
Benefits of building an email list
When people visit your blog, they’ve already invested time in you. At that point, it becomes much easier to get them onto your email list.
This is compared to getting emails from social media or other methods.
List building, or building an email list, requires an exchange in value.
Give the user something important, and they will give their email.
It must be important to them, not you. This is far simpler for a blog.
Because a blog already provides tons of value by answering their questions or solving their needs.
With a bit of a push [Via a call to action], you obtain their email. Here are other benefits of building an email list as a blogger:
An email list belongs to you
Your email list is your own. Unlike social media, where the platform can take your account whenever they want, it’s not as easy with an email.
Ever seen Google ban or take away someone’s Gmail account? No. It belongs to you alone. Just like your website.
And the same goes for the list you’ve built. You can send emails for anything pretty quickly to several people.
There are few restrictions compared to social media.
A better understanding of your users
When you build an email list, you understand who your users are. Since you brought them onto your list through certain methods.
Those methods can give you a good insight into your users. And, you can further understand them by sending out surveys, polls, etc.
Remember, you can send anything to your entire list.
Email subscribers share more
As email subscribers, users are more likely to share your content than social media followers would. In fact, email subscribers are 3.9 times more likely to share content
One main reason is that a person spends more time reading an email than looking at a social post.
They are far more invested in your mail, which increases the chances of them sharing it.
An email list, like a blog, is a long term asset
An email is a lifelong asset. No one can take it from you, and you can use it to earn income whenever you want. 81% of small businesses rely on email as their primary customer acquisition channel, and 80% for retention.
Immediate traffic to new blog posts
Since you’re using blog posts to build the email list, that email list will also provide your new blog content with immediate traffic.
When you push out a new blog post, you can share it with your email list to get instant views.
More FAQ
List building is important because it creates a database of clients to who you always have access and always have the ability to sell. Most social media accounts are built to gain a following to get a database of potential leads as well.
The only difference is that an email list belongs to you, and no one can take it from you. Whereas with social media followers, your account can be banned or you can lose followers.
List building is the process of creating a database of emails that you can use to generate leads.
List management is the process of nurturing your leads and ensuring they consistently gain value from you [The warmer the lead, the easier to convert them]
To get 10,000 email subscribers, you must get a blog, rank on Google, get a social media following and direct them to your blog. Your blog then must contain strong calls to action that get people to give their email.
This can be done by providing your blog visitors with FREE resources [21 lead magnets mentioned in this article].
The fastest way to get subscribers to your email list is by providing FREE resources on your blog and social media accounts. If you want someone’s email, give them something valuable in return, and make sure it’s an immediate source of value.
An example of an immediate source of value is an EBook or checklist. A passive source of value would be just providing them with a weekly newsletter that may help them long term [Not immediately].
To create a FREE mailing list, you need to:
Create a signup form using a FREE list building service like SendInBlue >
Install their FREE WordPress plugin >
Create a signup form using their plugin and create a FREE resource you can provide to your subscribers once they subscribe >
Once your blog visitors start subscribing, you can start seeing the list on the SendInBlue dashboard >
You can also send out emails to your subscribers for FREE >
And, you can also export the email list to your local excel sheets so you always have access to those emails.
To add a newsletter signup to WordPress:
Install and activate the WPForms plugin on WordPress >
Use their custom drag and drop editor to build a newsletter signup form >
Then using the embed option, get the shortcode and place it wherever you want on your blog
If you have a theme like Kadence, you can add the form wherever you want as a widget [See the in depth procedure in this article]